Implant Restorations 101 – Implant Ninja


!!!! تــخفيــض لمدة يوم
.الحـق العـرض قـبل أن يـنتهي
$25.00
trust_2dea69ed-7223-44f3-828d-a80bc0f3aef4

Description

Course Curriculum
Introduction
• Start Welcome to the Course! (0:45 )
Syllabus
• Start Don’t be a stranger!
• Start Important Things to Know
• Start Join the Ninjas Community!
• Start Coffee and Case Reviews with Dr. Steve Vorholt! (1:02 )
• Start Meet your Instructors (1:15 )
Tools of the Trade
• Start Intro to Tools of the Trade (0:30 )
• Start 1/4 Wrench Rundown
• Start 2/4 Wrench Rundown
• Start 3/4 Wrench Rundown
• Start 4/4 Wrench Rundown
• Start Things that Attach to the Implant – Overview
• Start Quick Recap (0:37 )
• Start Armamentarium Video (6:11 )
• Start Phoning a friend… (0:09 )
• Start Deep Dive into Wrenches (9:36 )
Screw Heads/ Driver Tips
• Start Introduction (0:16 )
• Start The problem (4:58 )
• Start Screw Heads vs Prosthetic Screws
• Start Implant Driver (4:59 )
• Start 0.050 Hex
• Start 0.048 Hex
• Start Nobel Torx
• Start Straumann Torx
• Start Zest Locator
• Start Neodent
• Start If you cant ID…
Checkpoint #1
• Start Through the First Stage!
Identifying Different Implants
• Start Intro to Identifying Different Implants (0:18 )
• Start Step 1: Try to Get Records
• Start Step 2: Take an X ray
• Start Step 3: Try to take off the healing abutment
• Start Step 4: Take picture of the platform
• Start Step 5: Re-appoint and order parts
• Start Step 6: Place impression copings and take x rays
• Start How to Identify Implant Platforms and Systems (8:24 )
Types of Restorations
• Start Intro to Types of Restorations (0:22 )
• Start Screw Retained – whiteboard (8:29 )
• Start Screw Retained – model (0:19 )
• Start Cement Retained – whiteboard (5:11 )
• Start Cement Retained – model (0:51 )
• Start Cement Retained Hybrid Abutment – model (1:02 )
• Start Screw-mentable – whiteboard (3:44 )
• Start Stock Abutment vs Custom Abutment – whiteboard (3:44 )
• Start UCLA abutment – whiteboard (4:41 )
Tooth Materials
• Start Introduction to Restorative Materials (0:17 )
• Start Zirconium (4:17 )
• Start Lithium Discillicate (4:24 )
• Start PFM (5:15 )
• Start Choice of Cement for Routine Cases (4:03 )
• Start Choice of Cement for Anterior Cases (2:24 )
Checkpoint #2
• Start Treatment Planning Badge
Restorability Check
• Start Intro to Restorability Check (0:14 )
• Start How to tell if your implant is ready to restore? (3:38 )
• Start Should I use ISQ? (2:21 )
• Start Thoughts on Reverse Torque (1:51 )
• Start Acceptable level of bone loss at this point (2:58 )
• Start Taking off healing abutment (2:31 )
• Start Stage 1 vs Stage 2 – When to use a cover screw vs healing abutment (2:18 )
Open Tray Impressions
• Start Intro to Open Tray (0:11 )
• Start When to use? (1:58 )
• Start What does the open tray impression coping look like? (1:33 )
• Start How to place the open tray coping and know if it’s fully seated (2:27 )
• Start How to cut the tray (2:05 )
• Start How to take the impression (2:18 )
• Start Pulling the Tray OFF
• Start Evaluating the impression, is it good or bad? (1:13 )
Closed Tray Impressions
• Start Intro to Closed Tray (0:16 )
• Start When to use? (1:24 )
• Start What does the closed tray impression coping look like (2:01 )
• Start How to place the closed tray coping and know if it’s fully seated (2:35 )
• Start How to take the impression (1:36 )
• Start Pulling the Tray OFF
• Start Evaluating the impression, is it good or bad? (1:19 )
Intraoral Scanning
• Start When to use (2:03 )
• Start Comparisons of scan bodies (1:27 )
Bite Registration
• Start Taking the bite – model (0:59 )
• Start What I use for bite registration and why (0:26 )
• Start Evaluating and modifying the bite registration – model (3:33 )
• Start What the Soft Tissue Mastercast Looks Like (0:37 )
Lab Stu
• Start The Lab Slip Example (5:44 )
• Start The model you get back (0:45 )
Moving on to Delivery!
• Start Movin on! (0:27 )
Cement Retained Crown
• Start What is an abutment seating jig (1:01 )
• Start Assessing the crown (3:03 )
• Start Seating the abutment – Model (1:30 )
• Start Seating the crown (0:44 )
• Start Occlusal Check (2:14 )
• Start Torque and Close up access hole (2:19 )
• Start Cement jig (1:02 )
• Start Cleaning the cement (2:39 )
• Start Seating the abutment and Delivery – Patient (6:18 )
FAQ
Screw Retained Crown
• Start Assessing the crown (4:23 )
• Start Seating the crown (2:56 )
• Start Interproximal Adjustment (2:09 )
• Start Occlusal Adjustment (3:31 )
• Start Torque (1:50 )
• Start Closing up the access hole (2:51 )
Checkpoint #3
• Start Delivered!!!
Occlusion Theory and Practice
• Start Intro to Occlusion Section (0:34 )
• Start Occlusal Considerations and Philosophies (9:34 )
• Start Occlusal Concepts (10:30 )
• Start Occlusal Schemes for Posterior and Anterior Teeth (14:11 )
Follow Up Care
• Start How often to see patients after delivery (0:41 )
• Start Do they need a nightguard (0:29 )
• Start How to tell if something is wrong (1:24 )
Complications
• Start Intro to Complications (0:15 )
• Start Loose crown, how to handle it (3:02 )
• Start Stripped Screw (1:09 )
• Start Not Enough Restorative Room (1:57 )
• Start Debris stuck in the Screw Channel (2:59 )
• Start Bone Impingement: Impression Coping not seated all the way (5:33 )
Farewell
• Start Post Course Discussion with host and instructor (3:24 )

0+
مشترك سعيد

آراء الأطـباء المـشتركين

photo_5276268015358442330_y
photo_5276268015358442324_y
photo_5276268015358442329_y
photo_5276268015358442328_y_d714bcec-b011-4d1c-9d91-578b95afa5bc
photo_5276268015358442326_y
photo_5276268015358442327_y
photo_5276268015358442325_y
photo_5276268015358442323_y
photo_5276268015358442321_y_7898e60c-24f3-40cd-ac98-c3c55d0e0c1a
photo_5276268015358442322_y

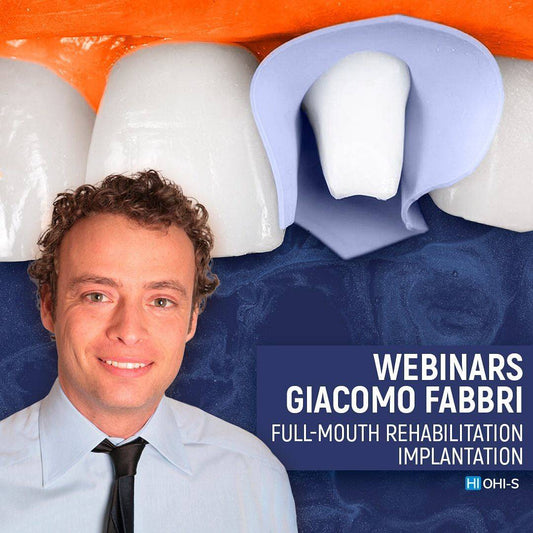
 الاحتراف في التجميل 👇🏻👇🏻👇🏻👇🏻👇🏻

📚📚 حزمة التأسيس 

50$
أكثر من 130 فيديو تعليمي يغطي أساسيات الفلر والبوتوكس خطوة بخطوة.
أكثر من 75 ساعة تدريبية تجمع بين الشرح النظري والتطبيق العملي.
 محتوى مبسط ومنهجي يساعدك على فهم الإجراءات التجميلية بسهولة مُصمم لكونك في بداية الطريق.
 أغلب ألاطباء بدرجة بروفيسور في الجراحة التجميلية و خبراء لضمان تعلم صحيح واحترافي.
شرح تفاصيل دقيقة تمنحك ثقة إضافية أمام مراجعيك من البداية.
في نهاية هذه الكورسات ستكون قادر على حقن الفلر والبوتوكس بعلمية عالية وخطوات موثوقة.

📚📚 حزمة النخبة

150$
أكثر من 1000 فيديو تدريبي متقدم يغطّي أحدث تقنيات الفيلر والبوتوكس والإجراءات التجميلية الدقيقة.
 أكثر من 150 ساعة تدريبية معمّقة تركّز على رفع
 مستوى الأداء والوصول إلى الاحتراف.
ورش عمل متقدمة (Hands-on) لتوضيح كيفية
 تطبيق التقنيات المتقدمة
 دروس متخصصة في تصحيح الأخطاء والتعامل مع
 المضاعفات الخطيرة.


YOU WILL LIKE ALSO