


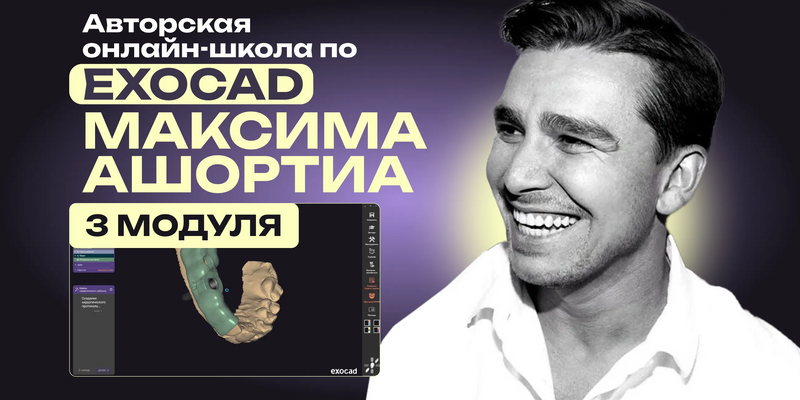
Author online school for EXOCAD by Maxim Ashortia. From beginner to advanced level

Author online school for EXOCAD by Maxim Ashortia. From beginner to advanced level

عن الكورس
مدرسة كاملة لتعلم الـ EXOCAD من الصفر للمستوى المتقدم مع Maksim Ashortia، مدرب معتمد رسمياً. تتكون من 3 وحدات تخليك تسوي مشاريع Digital بأي درجة صعوبة.
مناسب لـ: طبيب الأسنان العام، أخصائي الـ Prosthodontics وفني الأسنان
شنو راح تتعلم:
- أساسيات الـ Digital Design بالـ EXOCAD
- الـ DSD والـ Complete Denture والـ Splints
- دمج الأدوات الـ Digital وتوسيع إمكانيات البرنامج
- نصايح لتسريع الـ Workflow وتحليل حالات
Author's Online School for EXOCAD by Maksim Ashortia. From beginner to advanced level
Course overview
The author’s school by Maksim Ashortia enables mastering EXOCAD from fundamentals to advanced protocols, learning to create digital projects of any complexity and adopting the experience of an officially certified trainer.
The course consists of 3 modules:
- Module 1: Introduction to digital design in EXOCAD
- Module 2: Advanced digital dentistry: DSD, full removable prostheses, complete denture, splints
- Module 3: Extended capabilities of EXOCAD: integration of digital tools
This course will allow you:
- Master modern approaches to digital Smile Design planning
- Confidently work in EXOCAD and apply digital design protocols in daily practice
- Create orthopedic and surgical constructions of any complexity
- Effectively integrate digital technologies into clinical and laboratory work
- Apply the most advanced digital implantology protocols
Course lessons
Lesson 1. Basic skills for EXOCAD
- Setting up the workspace
- Creating a new project
- Importing STL file of an intraoral scan
- Checking scan quality
- Organizing the patient database
- Working with tooth libraries
- Tools for editing and adjusting shapes
- Using automatic functions
Lesson 2. Comprehensive anatomy in EXOCAD
- Interface and core tools
- Setting up tooth library
- Automatic anatomy generation
- Contour and occlusal surface adjustment
- Working with interproximal contacts and proximal surfaces
- Creating an anatomical crown
- Designing bridges with full anatomy
Lesson 3. Reduced bridge in EXOCAD
- Choosing tooth shapes from the library
- Adjusting thickness and reduction
- Setting reduction for ceramic coverage
- Common design mistakes and how to avoid them
- Using thickness and contact analysis tools
- Modeling time optimization
Lesson 4. Step-by-step protocol for designing inlays and veneers
- Select restoration type in the program menu (inlay/onlay, veneer)
- Configure parameters and choose material
- Select tooth form from library
- Manual refinement of anatomy and contact surfaces
- Adjust thickness and translucency of the restoration
- Discussion of common mistakes and how to avoid them
Lesson 5. OverPress crown design protocol
- Introduction to OverPress technology: definition and purpose of the method
- Step-by-step design protocol and creating a Framework
- Setting up reduced anatomy and checking contacts and occlusion
- Practical recommendations for a successful result
Lesson 6. Virtual shell preparation
- Definition of key anatomical landmarks
- Benefits of virtual preparation
- Creating basic reduction for Shell
- Optimizing shape for aesthetics and function
Lesson 7. Wax-up modeling
- Overview of stages for creating a wax-up in the digital protocol
- Importance of precise anatomy reproduction for functionality and aesthetics of the restoration
- Checking interproximal contacts and bite
- Making final adjustments to achieve the perfect result
Lesson 8. Abutment modeling. Screwed retention
- Overview of scan files and filling the project on the lateral group of teeth
- Overview of abutments and libraries
- Preparing scans for modeling
- Modeling crown anatomy
- Designing custom abutments
- Peculiarities of preparing subgingival profile
- Variants of abutment shapes and modeling methods
Lesson 9. Modeling a cantilever framework with attachments
- Step-by-step modeling of the cantilever framework with attachments
- Choosing attachment type
- Working with profile parameters
- Analysis of key design points
Lesson 10. Virtual articulator: step-by-step jaw positioning
- Virtual articulatory system
- Guidelines for plaster mounting
- Segmentation of maxillary and mandibular jaws
- Spherical analysis
- Diagnostic positions
Lesson 11. Disassemblable model for printing
- Importing STL files into EXOCAD
- Checking the accuracy of scanned jaws
- Preparing scans for modeling
- Modeling crown anatomy
- Selecting tooth form library
- Aesthetic design and final refinement
- Preparing files for 3D printing
Lesson 12. Smile Design in EXOCAD
- Goals and objectives of digital smile design
- Advantages of using EXOCAD for aesthetic planning
- Combining photos and scans for accurate visualization
- Analyzing smile line and facial proportions
- Determining midline, interpupillary line, and nasolabial landmarks
- Aesthetic parameters: shape, size and proportions of teeth
- Working with tooth form libraries
- Transferring design for further modeling (Mock-up, Wax-up)
- Resizing and reshaping teeth in the digital project
Lesson 13. Nuances and tips for working in EXOCAD
- Overview of hidden EXOCAD features
- Interface optimization for specific tasks
- Configuring hotkeys to speed up work
- Accelerating the design process
- Correcting common mistakes
- Useful function combinations to save time
- Working with micro-relief and surface texture
- Choosing tooth forms depending on the clinical case
- Tips to minimize errors when working with occlusion
Lesson 14. Modeling a splint in EXOCAD
Modeling a splint:
- Mounting scans in the articulator
- Detaching scans
- Project filling
- Defining insertion path
- Splint design
Modeling the positioning splint.
Lesson 15. Step-by-step modeling of a gingival correction template
- Review of scans and project filling
- Analysis of gingival contour and aesthetic smile line
- Aesthetic planning considering portrait photo
- Determination of gingival correction level according to treatment plan
- Modeling a template for gingival correction
- Discussion of clinical cases
Lesson 16. Modeling primary telescopes
- Review of scans and project filling
- Matching scans
- Principles of telescopic retention
- Differences between primary and secondary telescopes
- Indications and clinical cases
- 3D modeling of primary telescopes
- Transferring telescopes for milling
Lesson 17. Step-by-step modeling of Wax-Up
- Importing STL files of the upper and lower jaws into EXOCAD
- Assessing occlusion, smile line and aesthetic proportions
- Aligning patient photo for precise aesthetic planning
- Constructing the basic tooth shape considering anatomy
- Setting height, thickness and contour of crowns
- Selecting tooth forms from the EXOCAD library
- Transferring modeling from Wax-up to prepared teeth
- Delineating preparation boundaries
- Determining insertion path
- Adapting the tooth library to preliminary preparation
- Checking contacts and occlusion in a virtual articulator
- Correcting micro-relief and optimizing tooth contours
- Preparing the model for 3D printing
Lesson 18. Modeling an individualized spoon for Wax-Up transfer
- Importing STL jaw files
- Constructing the boundary of the individualized spoon considering alveolar crest anatomy
- Setting retention zones for stable impression fixation
- Creating a handle
- Exporting STL file for 3D printing
Lesson 19. Total modeling on implants with a virtual articulator
- Overview of full-denture modeling: indications and clinical tasks
- Using the virtual articulator for accurate occlusion
- Importing STL files of jaws
- Constructing a basic tooth row on implants
- Planning prosthesis design considering anatomy and aesthetics
- Printed prosthesis vs milled prosthesis
- Fabricating a surgical template
- Technical aspects of choosing a design for implant-supported prostheses
- Protocols for fabricating temporary reinforced constructions
- Steps of 3D modeling of the prosthesis
Lesson 20. Modeling full removable prosthesis in EXOCAD
- Preparatory steps for prostheses fabrication in EXOCAD
- Protocol for designing an occlusal template in EXOCAD
- Prosthesis model creation: demonstration
- Transferring temporary constructions and adjusting the articulator
- Gypsum mounting method in the articulator
- Adjusting contact points and functional movements
- Exporting STL file for 3D printing
Lesson 21. Digital template for predictable tooth preparation
- Uploading a file
- Constructing the base template shape
- Overlying the template on the digital model
- Checking fit and alignment with the treatment plan
- Exporting STL files in printing-ready format
Lesson 22. Interaction of EXOCAD with CBCT
- Setting up the file system
- 3D parameter configuration
- File upload
- Importing CBCT DICOM files into EXOCAD
- Aligning CBCT with STL scans of the jaw
- Gypsum mounting in the articulator based on CBCT data
- Foundations of precise alignment of scans, photos, and CBCT DICOM files
- Segmentation of upper and lower jaws on CBCT
- Virtual gypsum mounting of the aligned scans with CBCT
Lesson 23. Creating a custom spoon for transferring Wax-Up
- Introduction to the Wax-Up transfer concept
- Importing jaw STL files and completed Wax-Up into EXOCAD
- Defining the boundaries of the custom spoon
- Modeling the spoon for Wax-Up transfer
- Technical design parameters
- Preparation for 3D printing
Lesson 24. Modeling the secondary structure on a cantilever
- Overdenture prostheses supported by implants: advantages and disadvantages
- Technique for casting the secondary framework
- Modeling the secondary construction in Exocad: nuances and common mistakes
- Fitting the secondary construction: important aspects
- Base modeling with wax
- Custom gingival customization with acrylic: video demonstration
- Challenges when using cantilever constructions
Lesson 25. DentalCAD 3.0 Galway: capabilities and practical application
- Differences of Galway version from previous releases
- Navigation, toolbar optimization
- Opportunities for customizing workflows
- Step-by-step crown modeling in Galway
Lesson 26. EXOCAD and Blender for Dental (B4D): fabrication of cantilever and secondary constructions
- Importing jaw STL scans into EXOCAD
- Modeling in Exocad and preparing files to transfer to Blender
- Setting up beam profile parameters
- Designing connections for attachments
- Importing project from Exocad to Blender
- Getting acquainted with the Ibar module interface and functions
- Aligning the construction for proper subsequent work
- Creating and configuring tubes for implants-level constructions
- Outlining the contour and beam design
- Exporting files for milling
Lesson 27. Exocad 3.3: beam and gypsum mounting by sphere
Introduction to Exocad 3.3 functionality
Preparing data for beam design:
- Importing jaw and implant scans
- Aligning with the articulator
- Checking initial data
Beam design in Exocad 3.3
Practical demonstration:
Analysis of a clinical example
Tips for optimizing workflow.
أسئلة شائعة عن الكورس
من محاضر الكورس؟
الكورس مقدم من: Maksim Ashortia
كم مدة الكورس وكم درس فيه؟
الكورس يتكون من 27 درس، ومدته الكلية 12 ساعة و39 دقيقة.
هل الكورس كامل أو مجرد فيديوهات من يوتيوب؟
الكورس اشتراك كامل بكل الدروس المذكورة بالوصف (27 درس)، وليس فيديوهات يوتيوب أو مقاطع متفرقة.
متى يتفعّل الكورس بعد الدفع؟
التفعيل فوري خلال دقائق من إتمام الدفع في أغلب الحالات، وتوصلك رسالة على البريد الإلكتروني بكل تفاصيل التفعيل.
ما هي طرق الدفع المتوفرة؟
للأطباء داخل العراق: زين كاش، سوبر كي (ماستر الرافدين)، FIB أو رصيد آسيا سيل.
للأطباء خارج العراق: البطاقة البنكية، أو طرق دفع محلية في بعض الدول مثل مصر والجزائر وفلسطين وغيرها.
هل الدفع آمن؟
نعم، جميع عمليات الدفع محمية عبر بروتوكولات أمان SSL.
إذا صارت عندي مشكلة بالتفعيل، شنو الحل؟
فريق الدعم متواجد عبر واتساب أو تليغرام أو البريد الإلكتروني support@dentalcourse.store. وإذا كانت المشكلة بالتفعيل أو خلل من طرفنا، نستبدل لك الكورس.


